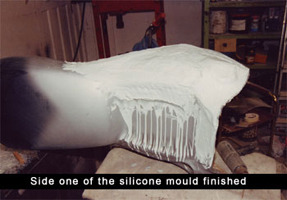
As
you can see from this shot a thick layer of silicone rubber as been applied
to one side. After curing the shell will be turned over and the whole process
repeated, a very messy and sticky operation, but hopefully worth it.
Eventually a full saddle mould will have been created out of Silicone rubber
joining the two sides together, this should guarantee the detail integrity of
the finished mould...
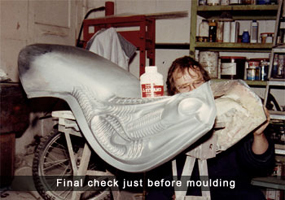
Once
the sculpting of the shell had been completed the whole ensemble was primed
and then checked for any defects that may affect the mould. Silicone rubber
is not a cheap material to use, not just in material cost but in time consumption,
so it pays to make sure everything is right before you start and that you have
everything planned in advance, it a bit late to realise that you have forgotten
the Plasticine when your precious silicone rubber is pouring all over the floor..
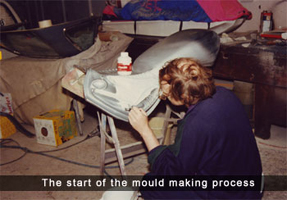
Applying
Silicone rubber can be a time consuming and tedious operation especially
in this case, as air bubbles are an occupational hazard that in the worst
case scenario can destroy all your hard work. So a slow curing Silicone
rubber was essential as this had to be applied with a brush due to the number
of undercuts.
After the first coat had been applied and checked for air, a second coat
was applied with the addition of a thixotropic additive to thicken the goo
up even more, making the process even slower...